How To
Setting Up An iPad For Kids: A Simple Step-By-Step Guide
You want to set up an iPad for your child? In our step-by-step guide you learn everything you need to know when giving iPads to your kids.
You’re about to give your child an iPad.
The iPad is a wonderful device that can offer endless entertainment, education, and creativity for children of all ages.
But as parents, we also need to be aware of the potential risks and challenges that come with giving our kids access to this powerful technology. How can we make sure that our children are using the iPad safely, responsibly, and appropriately?
Some of the dangers of using the iPad as a child include:
- Exposure to inappropriate or harmful content, such as violence, pornography, or cyberbullying
- Addiction to the iPad, which can interfere with sleep, social skills, and academic performance
- Eye strain, headaches, and posture problems from staring at the screen for too long
- Reduced physical activity and outdoor play, which can affect health and development
What You Can Restrict
Fortunately, there are ways to prevent or minimize these problems by using parental controls on the iPad. Parental controls allow you to:
- Block or limit specific apps and features, such as games, social media, or in-app purchases
- Restrict the settings for explicit content, purchases and downloads, and privacy
- Set time limits and schedules for iPad use, and monitor your child’s activity and screen time
- Approve or decline your child’s requests for purchases or free downloads
- Check for sensitive photos or videos that your child may have received or sent
By using parental controls, you can help your child enjoy the benefits of the iPad without compromising their safety, well-being, or development.
In this article, we will show you how to set up parental controls on your child’s iPad, and how to customize them according to your child’s age and needs. We will also share some tips and best practices for managing your child’s iPad use and encouraging healthy habits. Let’s get started!
Get Started With Parental Controls
To start, you will need to create an Apple ID and a passcode for your child.
The easiest way to set up a device for your child is to go to Settings > Family > Family Sharing.
From there, press Add a Member > Create Child Account. This will take you through a few steps to create an account for your child.

Using the walkthrough will allow you to turn on Find My (to locate your child’s iPad), Ask to Buy (to restrict purchases in the App Store) and set content restrictions.
I did this on an iPad which I was already using. However, in order to let the iPad know that I am no longer using it and handing it over to my child, I’ll have to sign out from my account.
You can do this in Settings > [Your Name] > Sign Out.
If there the Sign Out button is grayed out, then you will need to erase all your data. Go through the steps to sign out from everything but do not proceed when you get the final warning that says you will be deleting everything.
Instead, cancel it when you see that menu.
This will allow you to sign out from your iCloud account, and then sign in using your child’s account, hence registering to the iPad that it should enforce the restrictions that you have put in place.
Read: Our Ultimate iPad RAM Guide – How Much Do You Really Need?

From now on, you will be able to monitor and control access to the iPad via another Apple device where you have logged in with your account. If you activated Ask to Buy, you will receive approval requests on your other Apple device.
If you need more control, then consider the steps below.
Creating a Passcode
Let’s start with the passcode. You can create a passcode by going to Settings > Passcode (or Face ID & Passcode).
Tap “Turn Passcode On”.
Then, enter a passcode. The default is six digits long but you can change it to an alphanumeric or four-digit passcode by pressing “Passcode Options”.
Enter your passcode to confirm and turn it on.
Finally, you could restrict your child’s ability to change this passcode by going to Settings > Screen Time > Content & Privacy Restrictions.
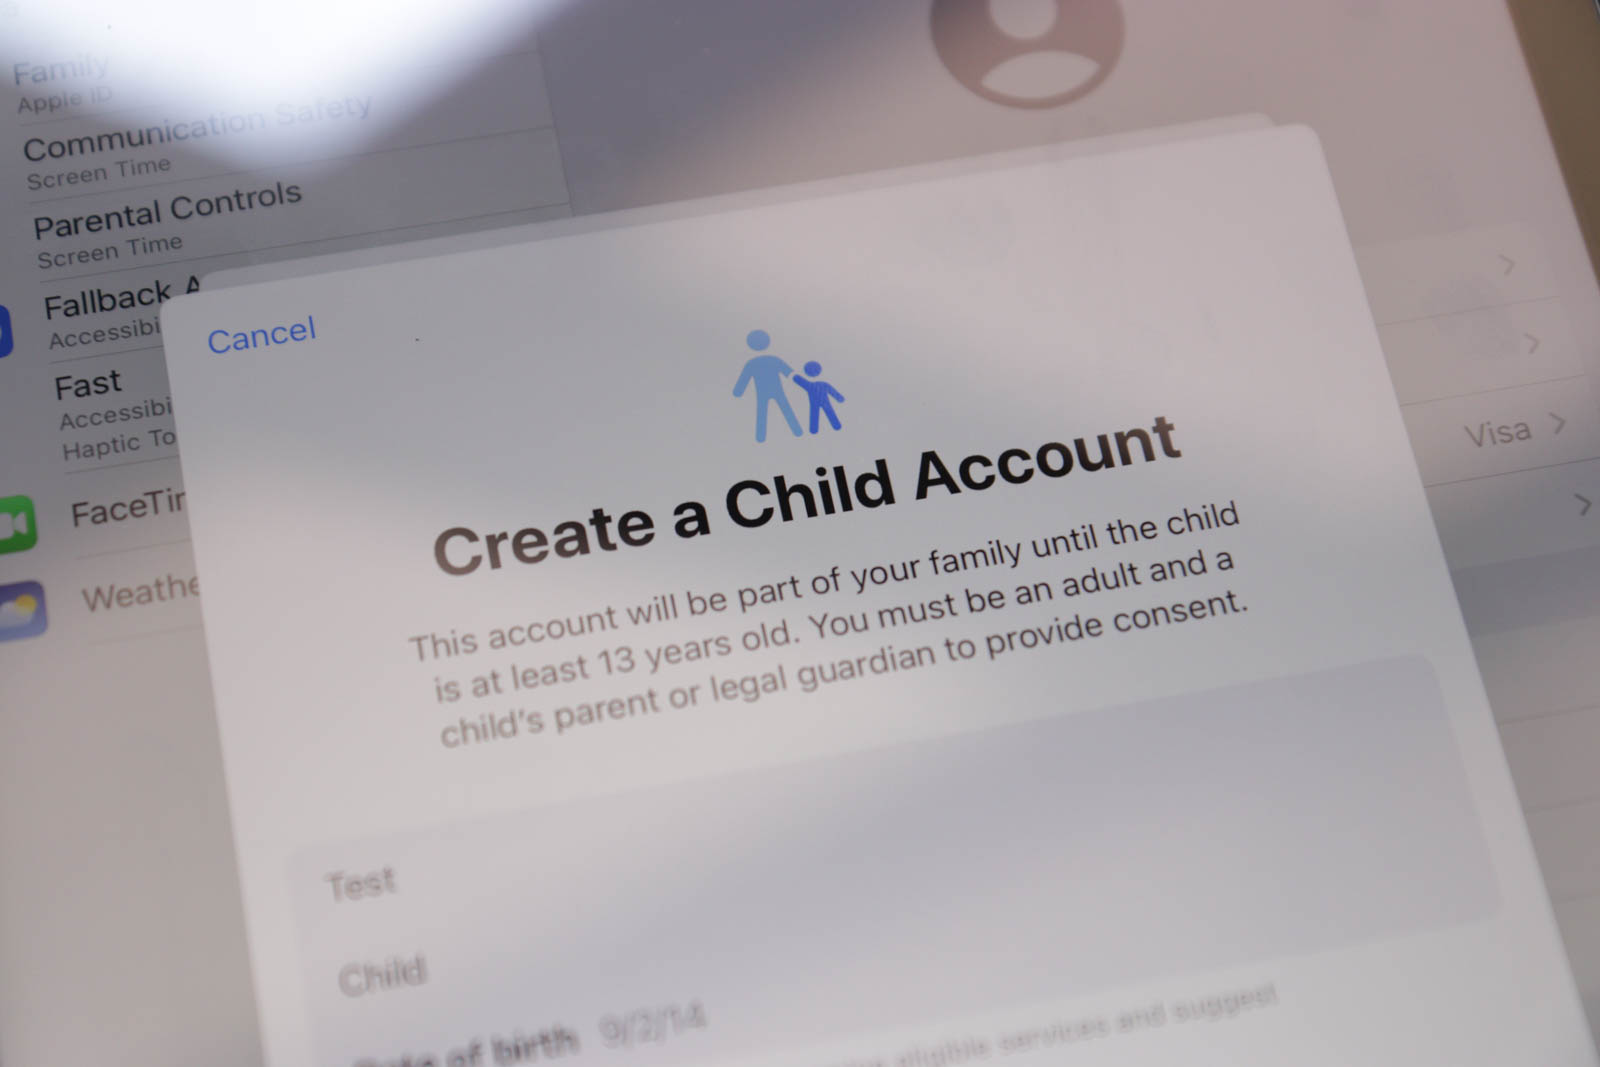
Creating An Apple ID For Your Child
Creating an Apple ID for your child will separate your logins, files, photos and anything else private that you want to keep separate.
If your child is under 13, a parent will have to do it for them. Here’s how. You will need a credit card for this process.
- Go to Settings > Family
- Tap the Add Member button
- Press Create Child Account > Continue
- Enter the name of your child, their birth date and email in the following steps.
That’s it. Your child now has a separate account which they will use to interact with their iPad.
As you hold the parent account, it’s now important to setup the restrictions that your child will use the iPad under.
Restricting Child From iPad App Store
Now that your child has an Apple ID, they can download apps from the App Store, but you might not want your child to be buying apps without your approval, and there’s a way to ensure this.
- Go to Settings > Screen Time > Content & Privacy Restrictions and enter your passcode.
- Go to iTunes & App Store Purchases and set it to Don’t Allow.
Ask To Buy

However, you might prefer to use Ask to Buy instead, which allows you to approve purchases on your iPad or iPhone.
Ask to Buy is turned on automatically if your child is under 13, and must be turned on if your child is over that age.
When activated, you will receive an approval request anytime your child wants to buy something.
On your iPad or iPhone, go to Settings >[your name]’s Family Sharing > [your child’s name] > Ask to Buy
In this menu, you can decide to turn on or off Require Purchase Approval.
Setting Up Screen Time Limits On iPad
Apps like TikTok, Instagram and YouTube have seemingly endless content and therefore you might want to use the Screen Time limit to ensure your child doesn’t spend too much of their time on their device.
Setting this up will also allow you to see what websites your child visits and what apps they are using.
Go to Settings > Screen Time > This Is My Child’s Device
With this step, you have activated the Screen Time functionality. Here’s how you can check the statistics that Screen Time logs by going to Settings > Screen Time > See All Activity.
Content & Privacy Restrictions
In Screen Time, you can also set up content and privacy restrictions.
In this menu, you can disable apps such as the Camera app and restrict what kind of music or movies your child watches.
Access it by going to Settings > Screen Time > Content & Privacy Restrictions
Allow/Disallow Built-In Apps and Features
To change your Allowed Apps:
- Go to Settings and tap Screen Time.
- Tap Content & Privacy Restrictions.
- Enter your Screen Time passcode.
- Tap Allowed Apps.
- Select the apps you want to enable or disable access for your child.
Anything you disable here will be hidden from the Home Screen.
Read: How To Clean The Touchscreen Of Your iPad
Restrict Content Based On Ratings
Just like CDs of the 2000s had ratings, music and TV still has ratings and you can use this as a basis to choose what content your child gets access to.
To restrict explicit content,
Go to Settings > Screen Time > Content & Privacy Restrictions > Content Restrictions
You will see a ton of choices. Here’s a summary.
Here are the types of content you can restrict:
- Music, Podcasts, News, Fitness: prevent the playback of music, music videos, podcasts, news and workouts containing explicit content
- Music Videos: prevent finding and viewing music videos
- Music Profiles: prevent sharing what you’re listening to with friends and seeing what they’re listening to
- Films: prevent films with specific ratings
- TV Programs: prevent TV programs with specific ratings
- Books: Prevent content with specific ratings
- Apps: Prevent apps with specific ratings
- App Clips: prevent app clips with specific ratings
Restrict Web Content
This menu doesn’t cover the websites that your child might get access to, though. To restrict web content, you have to go to “Web Content” in the Content Restrictions menu.
Choose between:
- Unrestricted: No restrictions
- Limit Adult Websites: Uses a database of adult websites and blocks any attempt to connect to them
- Allowed Websites: you’d have to manually whitelist websites that are OK to visit.
Conclusion
In conclusion, setting up an iPad for kids can be a simple and easy process, as long as you follow some basic steps.
The easiest way is to add a family member, then follow the steps provided. Apple will provide some recommendations for settings.
You can also create a child-friendly environment by using Screen Time, Content & Privacy Restrictions, and Allowed Apps. If you need more control, Apple allows you to restrict specific apps, websites and content.
By doing so, you can ensure that your child enjoys a safe, educational, and entertaining experience with their iPad.


The Best Amazon Fire Tablets Compared | 2024 Edition
If you're in the market for the best Fire tablet, we've got your back! Here's a comprehensive comparison of all...


Top 7 Best Tablets Under $500 | 2024 Edition
Looking for the best tablet under $500? We test almost every tablet and here are our test winners in this...


Best Huawei Tablets: Why I Think You Shouldn’t Get One In 2024
Considering the US embargo that led to the lack of Google support, is it a wise decision to purchase a...


11 Best Tablets With 5G, 4G LTE & SIM Card Slot in 2024
Which are the best tablets with 5G, 4G LTE and SIM card slot? I'm reviewing almost every tablet and here...


11 Best Gaming Tablets for Playing Games Reviewed | 2024 Edition
Which are the best gaming tablets for gamers? We test every new device and try out many games. Here are...
-

 The Best6 months ago
9 Best Tablets With Stylus Pen For Drawing & Writing | 2024 Edition
-

 The Best5 months ago
Top 10 Best Tablets with a Keyboard | 2024 Edition
-

 The Best4 months ago
Top 15 Best Android Tablets Based On Real Reviews | 2024 Edition
-
The Best4 months ago
11 Best Tablets With 5G, 4G LTE & SIM Card Slot in 2024
-

 The Best4 months ago
6 Best 8-Inch Mini Tablets Review & Comparison | 2024 Edition
-

 The Best5 months ago
Top 3 Best Windows Tablets You Can Buy Today | 2024 Edition
-

 The Best6 months ago
The 8 Best Samsung Tablets: Our Big 2024 Comparison
-

 The Best6 months ago
Top 7 Best Large Screen Tablets Tested | 2024 Edition